Yesterday I spent my day trying to upload a custom Debian VM to Azure and stuck during the installation of the waagent daemon.
Background
I got an ISO file that installs a solution sitting on Debian 9. The goal was to create a VM with it and host it on Azure. So I created a new hyper-v VM on Azure with 32 cores and 128GB (D32s_v3) and followed the excellent guide in the Azure docs to prepare the VM to make it Azure-ready.
It worked flawlessly until I reached the point where you have to install the waagent daemon with
apt-get install waagent
As of writing this, the command installs the version 2.2.34-4 of waagent - and that killed my local VM during the installation of it: It somehow gets stuck and blocks the session. If you reconnect and continue with the steps in the article, the VM will not communicate with the Azure backend. And most importantly, SSH does not work at all so fixing the VM after copying to Azure is nearly impossible.
Solution
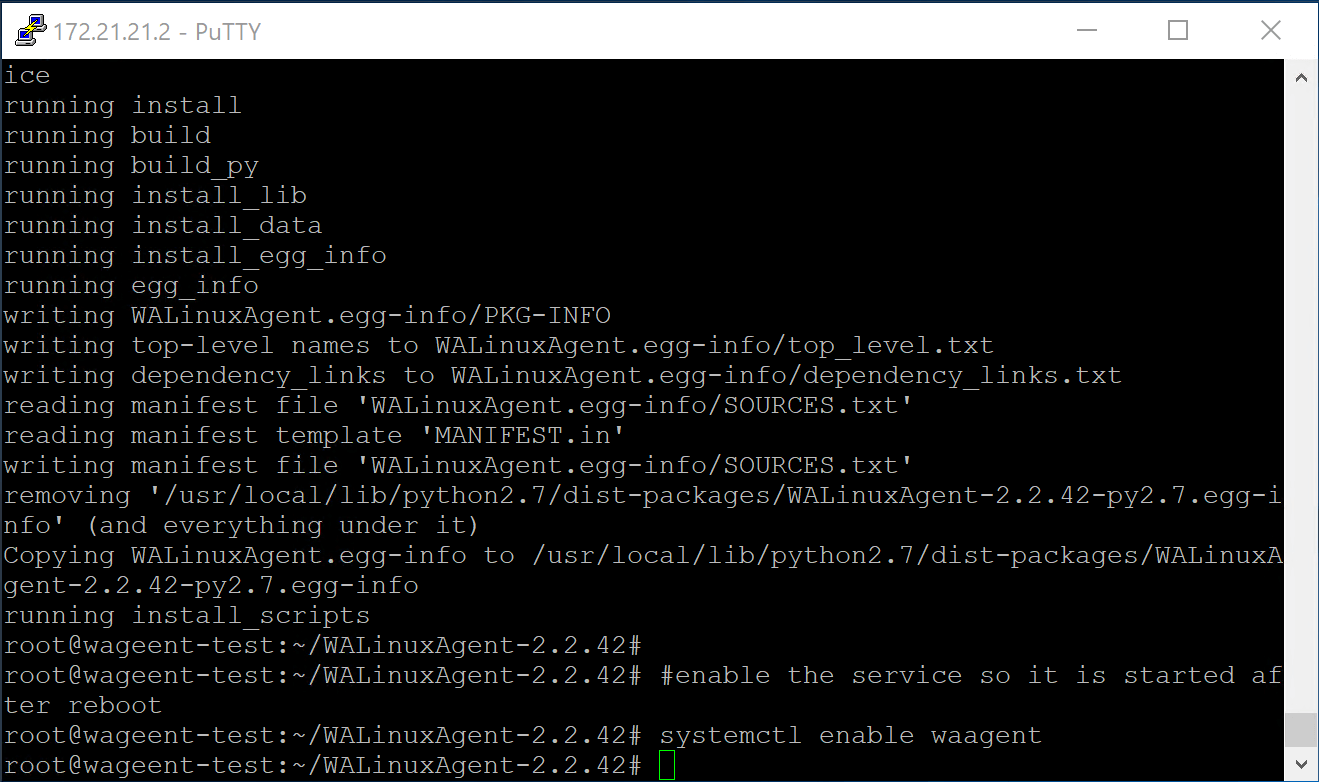
I tried to fix the waagent debian package but with zero success (dpkg-reconfigure, checking the logs, etc.) - I checked the github repository and the debian 2.2.34 package is quite dated (Nov 20, 2018!) - I opened an issue to get that fixed. Luckily you can install the waagent from source:
#download the waagent version 2.2.42
apt-get update
apt-get install unzip
wget https://github.com/Azure/WALinuxAgent/archive/v2.2.42.zip
unzip v2.2.42.zip
cd WALinuxAgent-2.2.42

#installing prerequisites
wget https://bootstrap.pypa.io/get-pip.py
python get-pip.py
pip install -U pip setuptools

#install the waagent
python setup.py install --register-service

#enable the service so it is started after reboot
systemctl enable waagent
After that you can ‘sysprep’ the linux image with:
waagent -deprovisionAnd then finally upload it to Azure, create a disk out of the VHD and create a VM with it. I used az storage blob upload in the first iterations, but was disappointed by the upload speed. Then I used Azure Storage Explorer and got speeds beyond 1000 Mbps. It uses AzCopy under the hood to make that possible:
$env:AZCOPY_CRED_TYPE = "Anonymous";
./azcopy.exe copy "<source>" "<targetSAS>" --overwrite=false --follow-symlinks --recursive --from-to=LocalBlob --blob-type=PageBlob --put-md5;
$env:AZCOPY_CRED_TYPE = "";
And then I created a disk and with that a new VM:
az disk create --resource-group <ResourceGroup> --name <DiskName> --source <UrlToBlob>
az vm create --resource-group <ResourceGroup> --location <location> --name <VMName> --os-type linux --attach-os-disk <DiskName> --accelerated-networking true --size Standard_D4s_v3
After that the VM was registered correctly and I can access it via SSH.
Learnings
During the migration I (re-)learned a couple of things:
- Nested-VMs on Azure is great for this. Spin up a decent VM with tons of cores and create a VM there. Networking took a while to configure, but the excellent post by Thomas Maurer helped me setting up the NAT so the inner VM could access the internet. His post was easier to understand than the Azure docs article.
- The VHD file must be fixed size and the old format - VHDX is not supported on Azure. Ensure that you have enough disk space on your OS disk if you place the file there. Oversizing the OS disk gives you a great performance boost - don’t be cheap, or be patient :)
- Uploading the fixed size VM, mine had 30GB takes a bunch of time - you can drastically speed things up if you use the AzCopy tool (or the Azure Storage Explorer). I reached 1100 Mbps!
- You can automate the entire chain of altering the image, stopping the VHD, uploading it, creating a disk, creating the VM - Azure CLI is awesome for that. That reduced my iteration time to ~15 minutes.
- A static IP within the nested VM is great to get going, but does not work once you have uploaded the VM to Azure. Don’t forget to change it to DHCP before you upload.
Hope it helps,
Max

Share this post
Twitter
Facebook
LinkedIn
Email