This is an english translation of my article for SharePoint Advent “VON A BIS Z: ERSTELLUNG EINES DISPLAY TEMPLATES FÜR DIE SHAREPOINT SUCHE UM DIE EIGENSCHAFTEN EINES DOKUMENTS SICHTBAR ZU MACHEN”.
Display Templates can be used in Web Parts to individualize search results (see also Introduction to Display Templates on MSDN).
In this article I will show you how a Display Template for SharePoint 2013 Search is structured, why you need them and how to customize/extend them.
Why YOU need Display Templates?
Not every search hit is equal - even a small icon helps the user to identify content more quickly than if only a monotonous mass of blue links is represented. And now that more and more content is stored in SharePoint, this is even more relevant. And integration solutions that can display many content of external system can be realized, too.
The rapid acquisition of information also plays a major role in user acceptance - if it additionally looks good and the system helps me to recognize information faster - well, search can rock - I use it daily in our own Intranet! In addition, the important content should be categorized and tagged in SharePoint - such additional work should also be visible in search results, so that the effort is also worth even more.
How is a Display Template structured?
Each display template consists of two files: a HTML version of the Display Template that you can edit in a HTML editor, and a JS file that SharePoint uses (dont touch that one!). The HTML file is structured always with the same pattern, in it is defined what property/metadata of the search hit will be shown. The HTML file can also contain JavaScript to dynamically display content or even implement business logic.
The following screenshot shows a typical SharePoint 2013 Search Center, with the 3 components that can be easily adapted: Item Display Template, Item Hover display template and the action bar.
(1) Item Display Template for a PowerPoint hit
(2) The corresponding Hover Template for PowerPoint
(3) Search Actions that can be directly started from within the search result
How can you change a Display Template?
In the following 5 steps I will show you how to customize the Display Template for PowerPoint so that an additional document property is displayed.
Step 1: Prepare List or Library
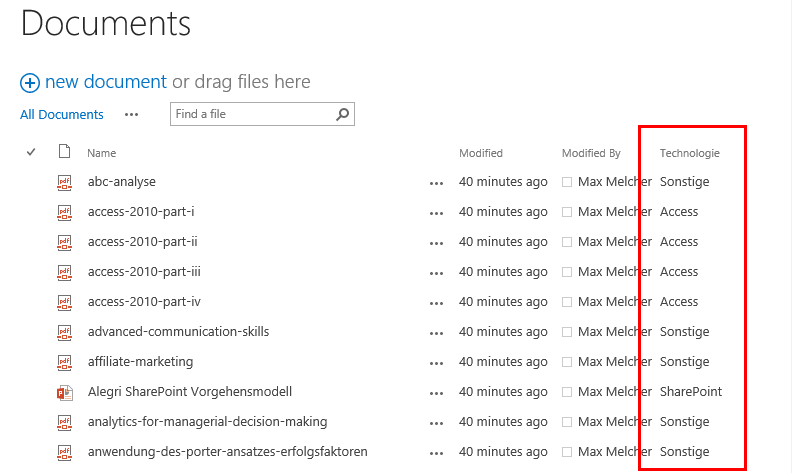
To view an additional document property, it must be available on at least one document / list item. For this simple example, I created a text column “technologie” and filled it with values:
Creation of the column is not enough, it must also be filled with at least one value
Step 2: Creating a Managed Property and full crawl
How can this additional value be used in SharePoint Search now? Automatically? Nope, unless its a site colum that you added to the list (see here). Otherwise a so-called Managed Property must be created now. To do this, go to Site Collection Administration - in SharePoint 2010 you had to go to Central Admin and had to be a farm administrator so this is a big step forward - and there then click on Search Schema. In the tab Managed Properties create a new property:
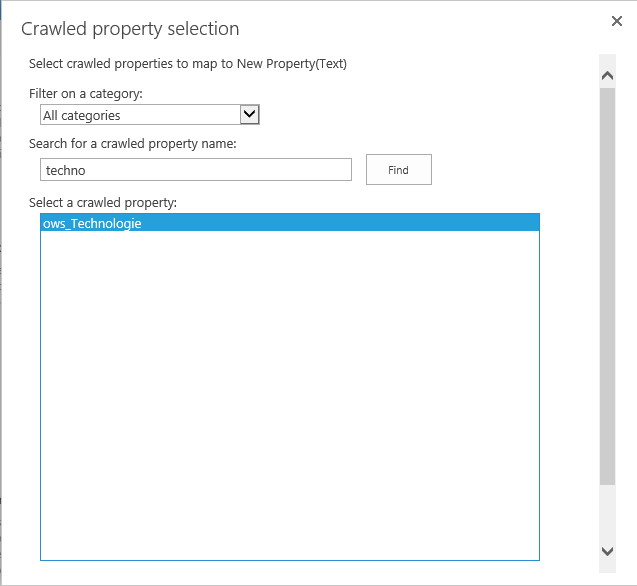
In the dialog create a property with a name, here its “Technologie”. Select retrievable and add at the very end of the page a mapping. The crawled property is called ows_technologie, just add it to the mapping:
The name of the crawled property for SharePoint content is always prefixed with “ows_”
If no value is displayed, the SharePoint search has not found the new column during a crawl. If you want to speed things up (its not like you have lots of choices here), go to Central Administration and start the crawl there. Once the crawled property is displayed, add it, and save the Managed Property with OK. After this the summary page for technology should look like this:
The Managed Property will be filled during the next full crawl - if you do not wanna wait, run a full crawl (again) in Central Administration.
Step 3: Customized the Display Template
Now to the actual customization of the Display Templates - the technology property is not automatically displayed. To modify a Display Template, download the display template from Master Page Gallery. For this change to the Site Collection Settings, open Master Page Gallery and then change to the folder “Display Templates” and then “Search”. This folder contains all display templates that can be used for the SharePoint search - as already described, an HTML file for editing and a JavaScript file that SharePoint generates every time the html file changes. For this example we will download the PowerPoint design template (item_PowerPoint.html) and open it with a text editor (eg. Notepad++). The content is a mixture of normal HTML format and Javascript - plus a placeholder language that can be used to display values from the search index.
In our case, just a few modifications are necessary. First adjust the title in the title tag so that we will find the display template later: SPAdvent PowerPoint item.
Then add to the html tag mso:ManagedPropertyMapping: ,’Technologie’:’Technologie’ - the coma at the beginning should not be missed. With this we tell SharePoint search that we need for this template display the value of technology and this is to be loaded with the search results.
As last step create a new line after line 38 and insert the following text:
The file should look like this now:
With this new HTML tag, a new row is displayed in the display template - the ctx.CurrentItem.Technologie will be replaced with the value from the search index, in this example our technology value.
Now save the file under a new name (don’t modify the existing ones!) and upload it back to the design templates library - in the same folder from which we have downloaded it. Simply close the dialog with OK after uploading.
Step 4: Creating the Result Type
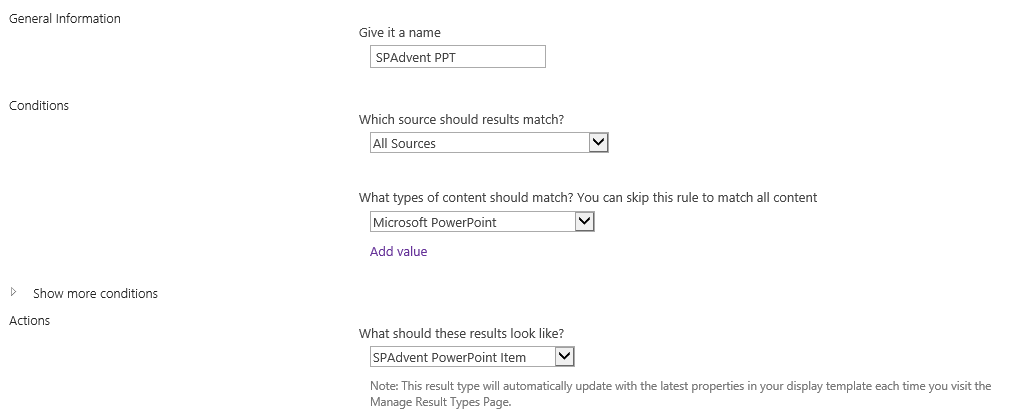
In order to tell SharePoint search that it should use our new Display Template for PowerPoint now, we need a new search result type. Go to the site settings and there to search result types. There we add a new one with the name SPAdvent PPT. The only condition we add is that we restrict it to type Microsoft PowerPoint. Finally, we choose the action - the result shall be represented by the SPAdvent PowerPoint display template:
Save it and then the search results type should look like this:
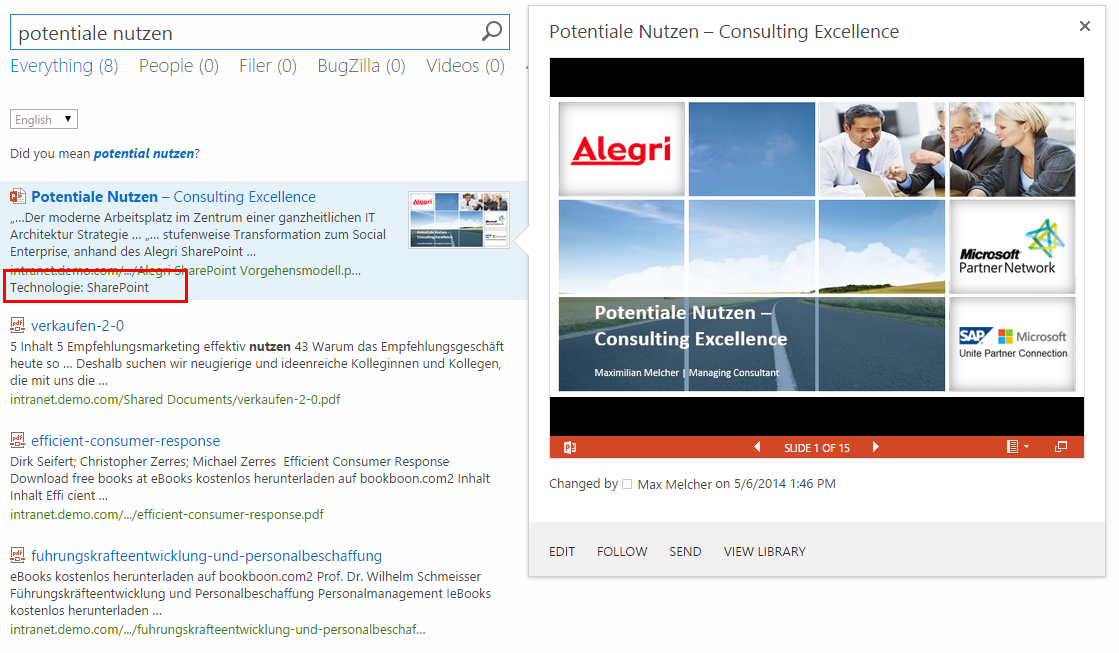
Step 5: Look at the result
So that’s it - the new Display Template is ready and will be used on the search page:
Although there are relatively many steps, still no “real” development or any special development languages are needed. Changes can be made quickly and easily implemented.
This simple example shows how powerful display templates can be and how quickly they can bring added value to the end user.
Further readings:
- Custom actions in a hover panel
- Search Query Tool (the one tool for all search queries!)
- Blog Series: Search Queries
- Collection of Display Templates








Share this post
Twitter
Facebook
LinkedIn
Email